How can I prepare my existing SmartFlow account for ezyVet integration?
Print
Modified on: Thu, 22 Oct, 2020 at 7:57 AM
If you already using your SmartFlow account and want to connect it with ezyVet, please take a look at the following steps to prepare for your integration setup and make your ezyVet implementation go as smoothly as possible.
It is important to take some initial preparation steps to prevent breaking any pre-installed SmartFlow Inventory items along with existing Treatment Templates. Let's make sure you can connect your items from your PIMS as efficiently as possible!
Pair things down and clean them up
The more items you have on your templates, and the more templates you have, the more work this will be. So, take some time to delete those templates you haven't even looked at in a year, and clean up the ones you're keeping!
Make your Treatment Templates work for ezyVet
1. Be sure to configure your Monitoring parameters to match the Health Status tab in ezyVet, as per the list HERE.
2. Make sure you have items in your templates to track billable items like:
- IV Catheter, Fluid setup, and Fluid bag replacement procedures
- Hospitalizations (q12 or q24)
- Additives and CRIs if applicable
- Dispensing and Administration fees for medications
Please ensure you speak with a SmartFlow staff member about setting these up correctly!
3. Name inventory products in SmartFlow the same way as they are in ezyVet, so that you can link them easily after the synchronization.
Preserve your current Treatment Templates
As a backup, we recommend you print out or save a copy of any of the templates you wish to continue using. This will help you to restore the initial template view, after adding ezyVet inventory to SmartFlow.
To do this:
1. Log into your SmartFlow web account and create a test patient.
2. Select the template you want to save, and apply it to the Flowsheet.
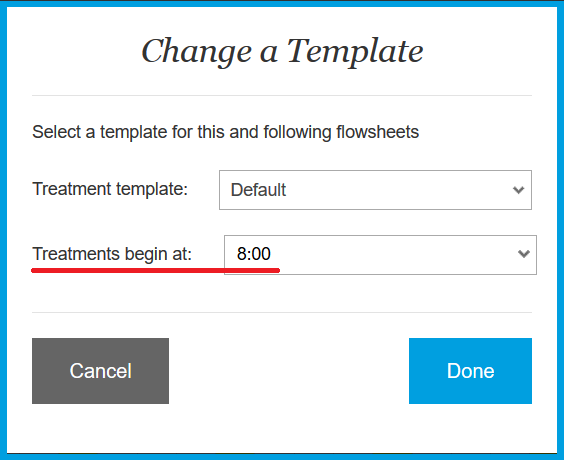
NOTE: Please make sure that the highlighting frequency can be determined from the PDF. To see a full-day highlighting, please make sure that the Treatments begin at time is equal to the Flowsheet start time:
Or add one more treatment day by Add 24 Hours > Copy.
3. Along the bottom of the Flowsheet, click on the Flowsheet PDF and download it to your computer so that you can print it later:

NOTE: Your tasks will NOT appear on the Flowsheet PDF and thus will have to be saved separately. You can do this a few ways:
1. For each Flowsheet you print out, manually write the tasks you have, so you have a record of it.
2. Open the template on an iPad and take a screenshot of it with the tasks displayed to retain a copy.
3. Mark each task as "complete", then save the Medical record as it will record the tasks there.
Sync your ezyVet Account with SmartFlow and upload inventory
A SmartFlow or ezyVet staff member will assist you with this!
NOTE: Please keep in mind that once integration is setup you will no longer be able to create patients from the SmartFlow itself, but you will need to create the hospitalizations from ezyVet's side.
You may also want to disable the ability to create new medications/parameters. You can do so from the Settings > EMR Integration page > set all parameter creation options to OFF:

If you choose to leave them ON, your staff will be able to create new medications/parameters in SmartFlow which will not synchronize with ezyVet, and thus will not transfer to the invoices.
Backward map your parameters
After the inventory upload, each SmartFlow parameter will need to be 'mapped' (connected) with the appropriate ezyVet item. To do this, please follow the steps described HERE.
Check your Treatment Templates
Do check over your templates for the first few patients to ensure all is well!
Finally, enjoy using your SmartFlow-ezyVet integration!
We also have a video that goes over the same steps which you can watch here.
* Please note that the attached video is an illustration and is subject to change as our product evolves!
Hope you found this information useful!
Did you find it helpful?
Yes
No
Send feedback Sorry we couldn't be helpful. Help us improve this article with your feedback.