How to send a patient from IDEXX Animana to SmartFlow?
Print
Modified on: Wed, 2 Apr, 2025 at 3:11 PM
If the Animana - SmartFlow integration is configured correctly for your account (you can find out how to do it HERE), you will be able to send any patient from Animana to SmartFlow for further treatment.
To send all the patient's data:
1. Open your Animana account > find the required patient > and open the Patient Data tab:

NOTE: If necessary you can add/edit any patient's information from this page. Please note which parameters will be transferred to SmartFlow, all of them are indicated by the red arrows on the screenshot above.
2. Open the Patient File tab > click the SmartFlow + button:

3. Click OK in the pop-up window to confirm sending the patient to SmartFlow:

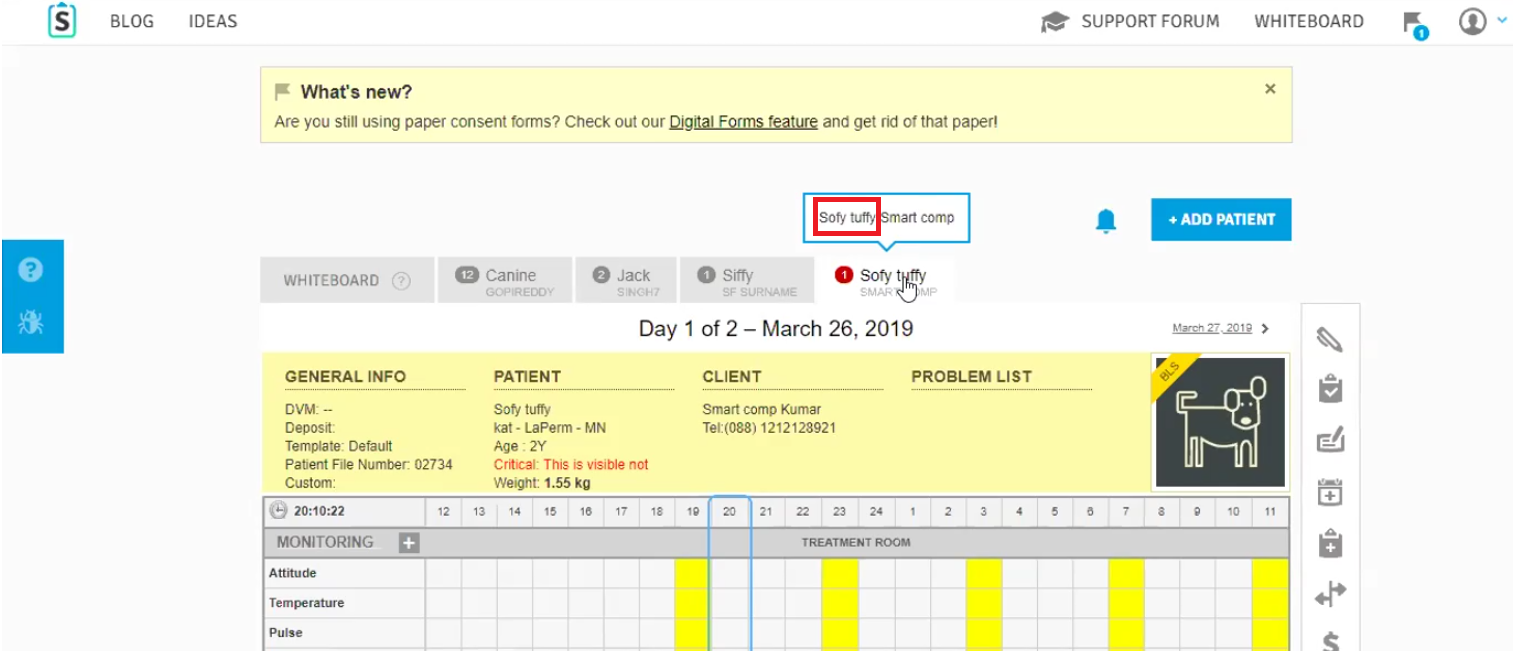
4. Then the patient will appear in SmartFlow!
5. In addition, for your convenience, your Animana account will contain a record in the patient History indicating when the patient was sent to SmartFlow. Also, you will have a little SmartFlow icon in the patient information, indicating that the patient is already sent to SmartFlow: 
NOTE: It is possible to set up automatic sending of the patient information from Animana to SmartFlow. For this please open your Animana account > click on the Settings button (with the gear wheel) > select General Settings > under the Settings list, open the SmartFlow Configuration tab > find your Location and tick the Link To Appointment Status box next to it (find more information on how to set up integration HERE). From now, after changing the patient appointment status to Arrived, patient information be immediately sent to SmartFlow. However, please note that this functionality does not work for recurring appointments.
We hope you found this information useful!
Did you find it helpful?
Yes
No
Send feedback Sorry we couldn't be helpful. Help us improve this article with your feedback.