How can I transfer unallocated SmartFlow patients to ezyVet?
Print
Modified on: Tue, 29 Dec, 2020 at 8:37 AM
The issue of having an unallocated patient may occur when a clinic needs to add a patient straight into SmartFlow without synchronizing all the information from ezyVet. When this happens, all procedures, tasks, notes, etc. are not assigned to any patient, therefore the items from SmartFlow will not connect to medical records or invoices on ezyVet. To fix this, please follow the below steps.
1. Please sign into your ezyVet account, go to the Dashboard > select the SmartFlow tab > set the Status to Unallocated:
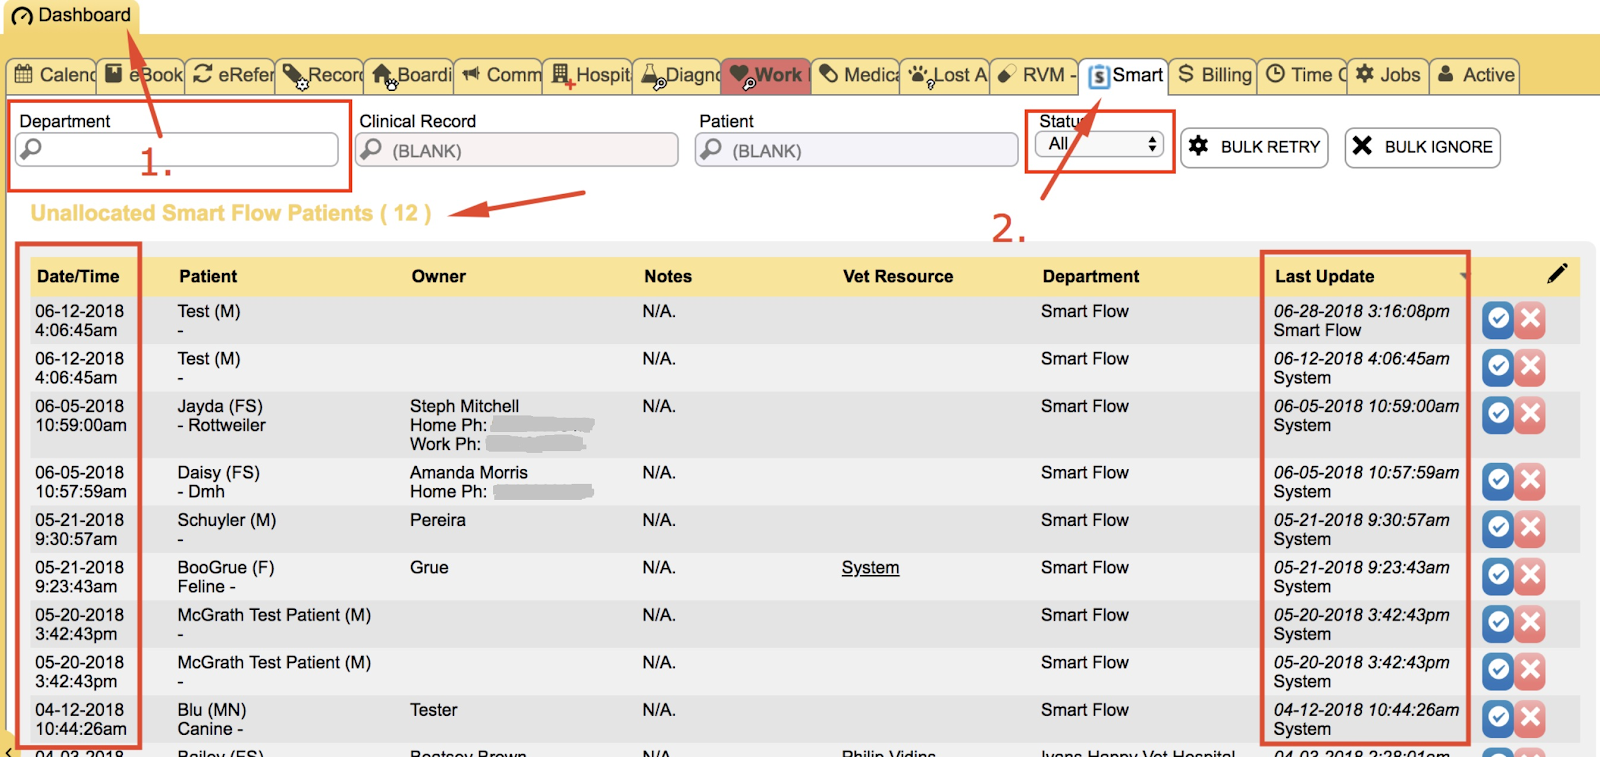
NOTE: All the unallocated patients that have been created will be displayed here.
2. To update the patients status and remove them from pending status (allocate them), click the checkmark (V) button that will be displayed on the right-hand side (where these buttons are displayed):

NOTE: You may also delete a patient if it was a test patient by clicking on the X button next to the appropriate patient.
3. Once the checkmark (V) button is pressed, it will ask you to search for the Existing Contact or to create a New Contact within ezyVet:
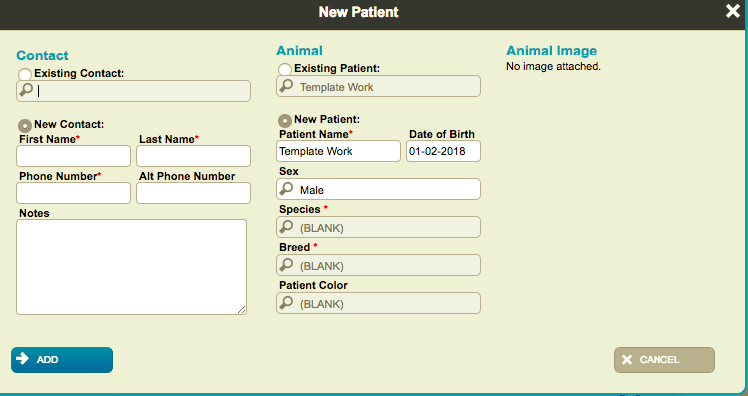
4. Fill out all the required fields to create a new patient and click Add. Then the pop-up window: “Patient confirmed, please create an appointment to sync” will appear. Please create an appointment and click Save. At this point, the patient should be allocated.
5. Go back to your SmartFlow account, find the patient, and update the patient info: set Patient file number is equal to Clinical record number for this patient in ezyVet.
NOTE: After this procedure is carried out you can see all of the communication between SmartFlow and ezyVet. If you are not seeing items that should be on the invoice or medical records, please follow steps 1 - 4 once again, but instead of setting the Status to Unallocated you can change it to ALL or FAILED.
Please check THIS video out for more detailed visual instructions.
We hope you found this information useful!
Did you find it helpful?
Yes
No
Send feedback Sorry we couldn't be helpful. Help us improve this article with your feedback.