How to record detailed diagnosis and treatment for each particular tooth?
Print
Modified on: Wed, 1 Jul, 2020 at 11:14 AM
When the quick dental examination is not enough and you need to record more details about the diagnosis and treatment for each particular tooth, please follow below steps:
1. As soon as you open the Dental Chart, tap on the desired tooth to select. As usual, you can interact with any tooth on the screen (including a side view from above and below), and use the zoom mode (to open it, click the magnifier button in the center of the chart):
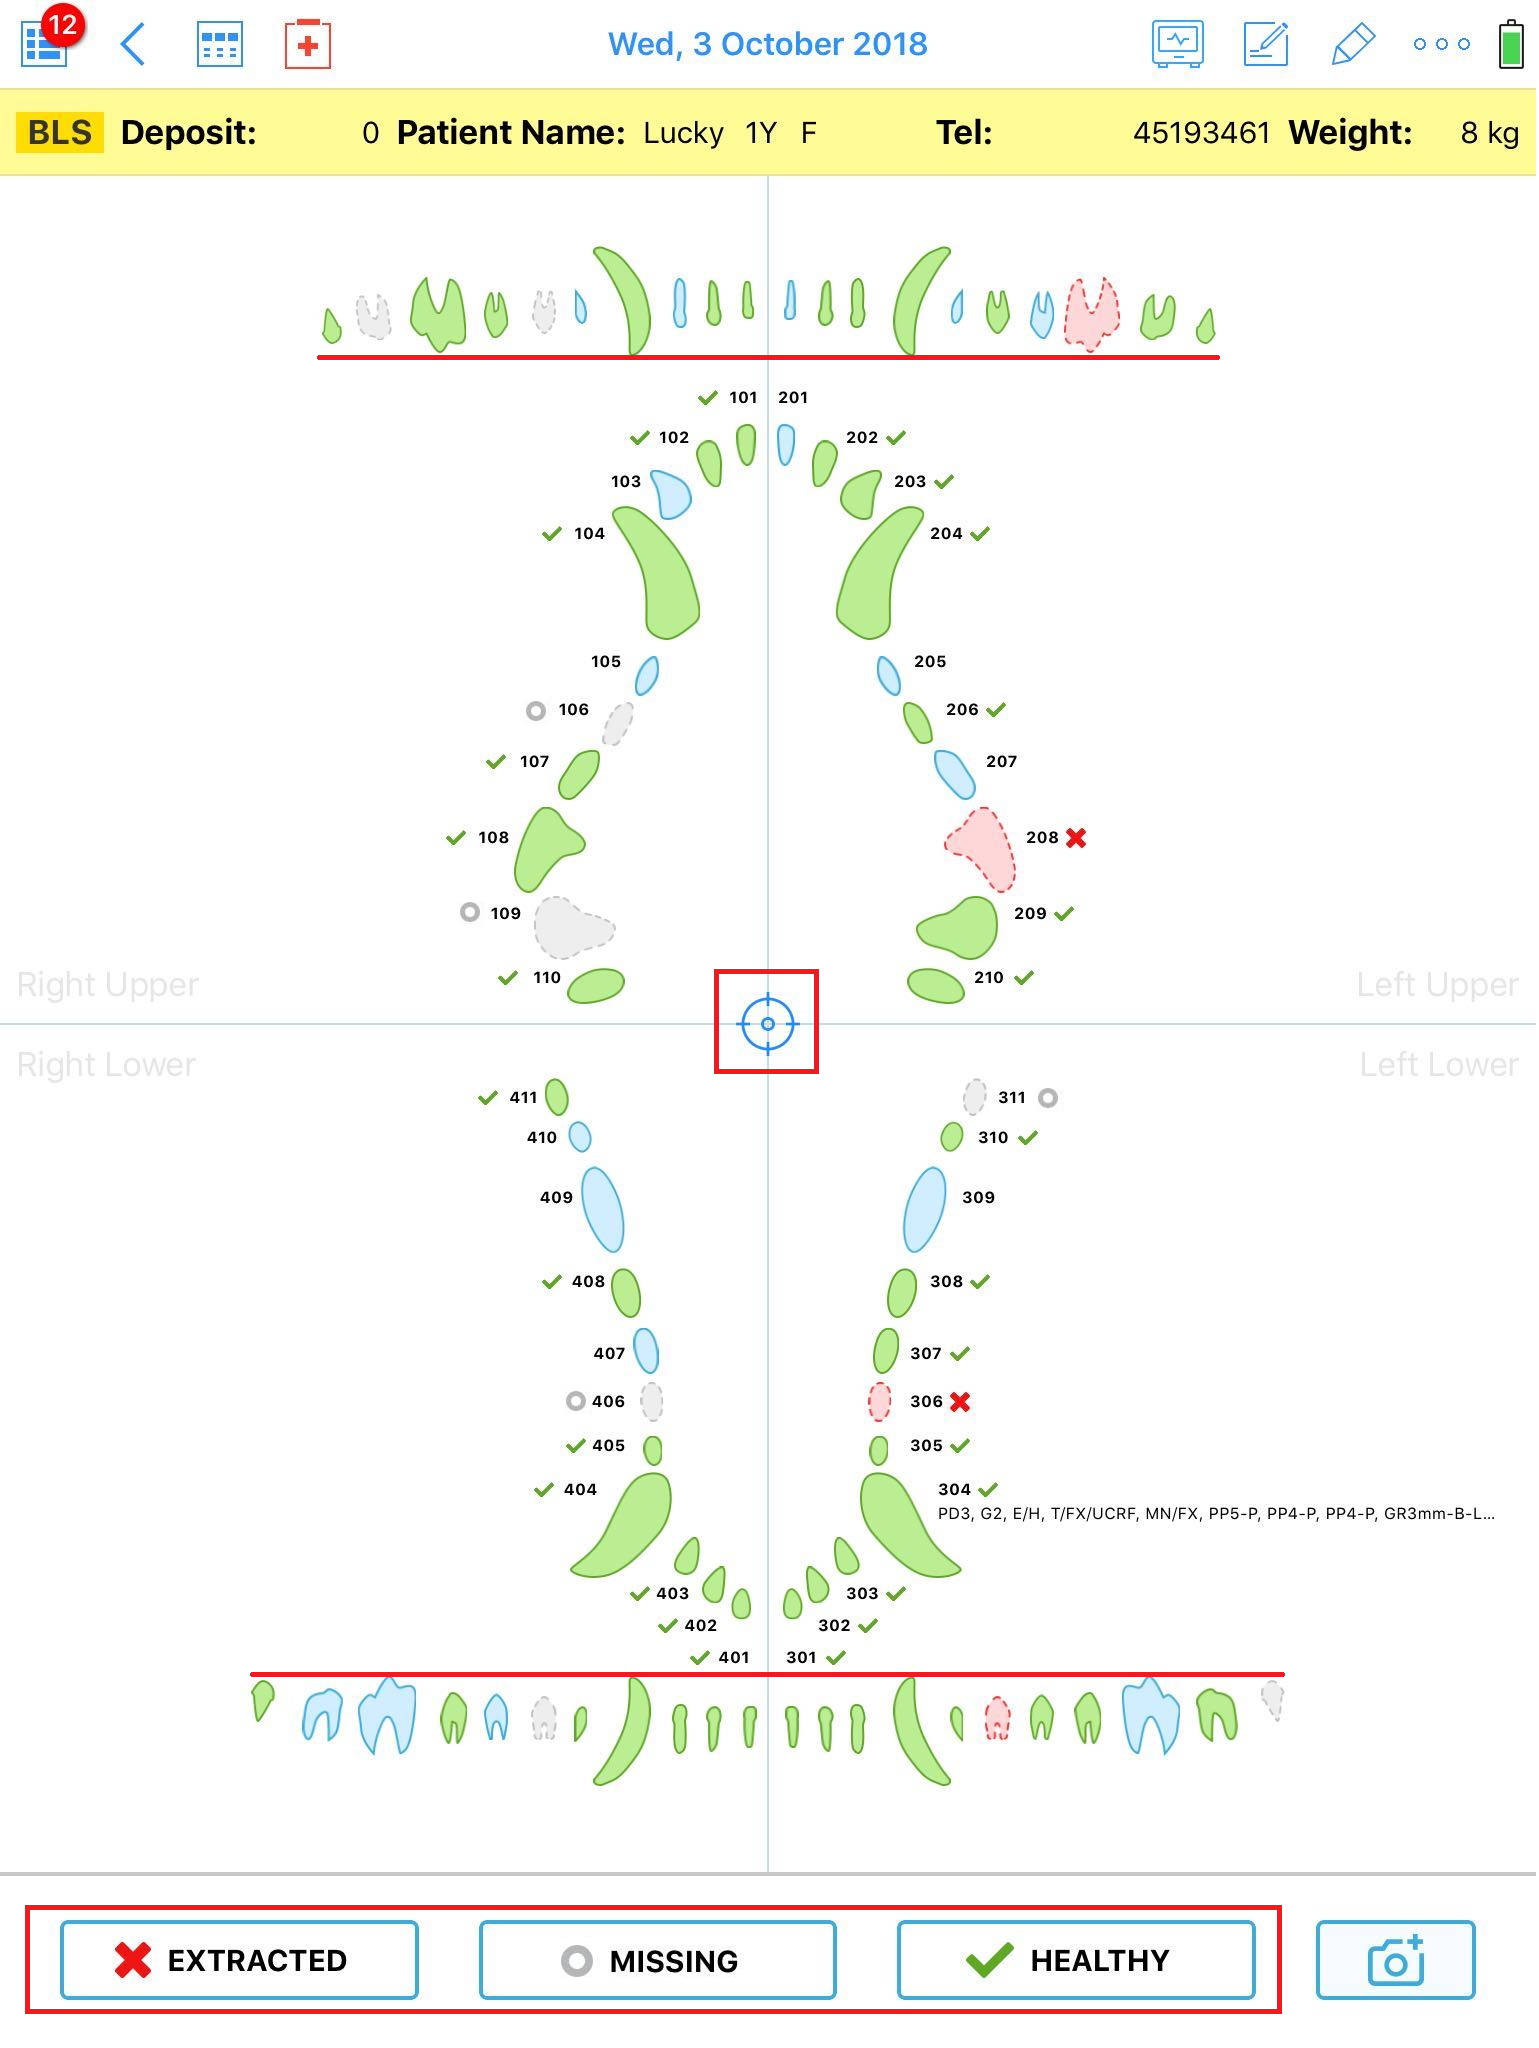
NOTE. The buttons of the tooth condition (Extracted, Missing, or Healthy) should not be selected.
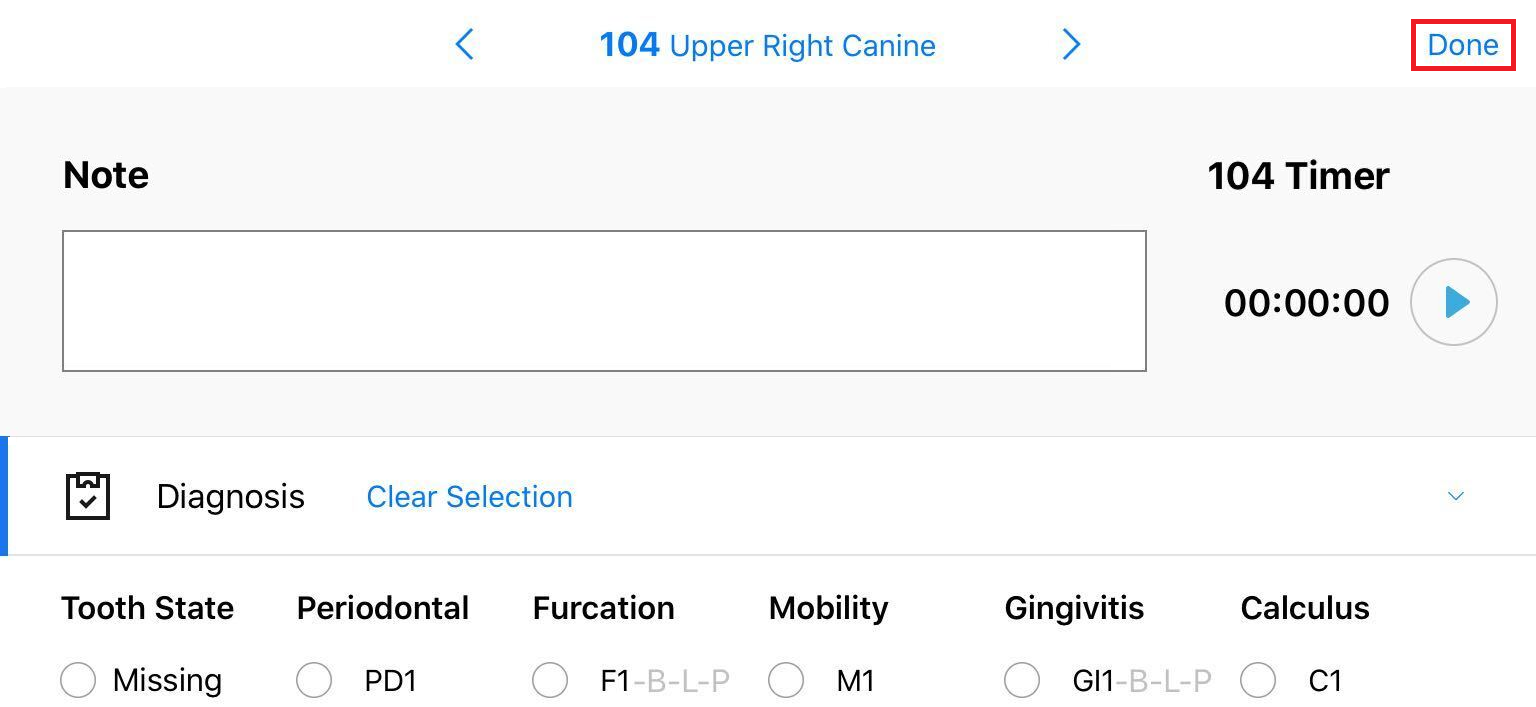
2. Once clicked, you can enter specific notes and details about the Diagnosis and Treatment. Also, you can track the procedure duration for each particular tooth, please find more information HERE.
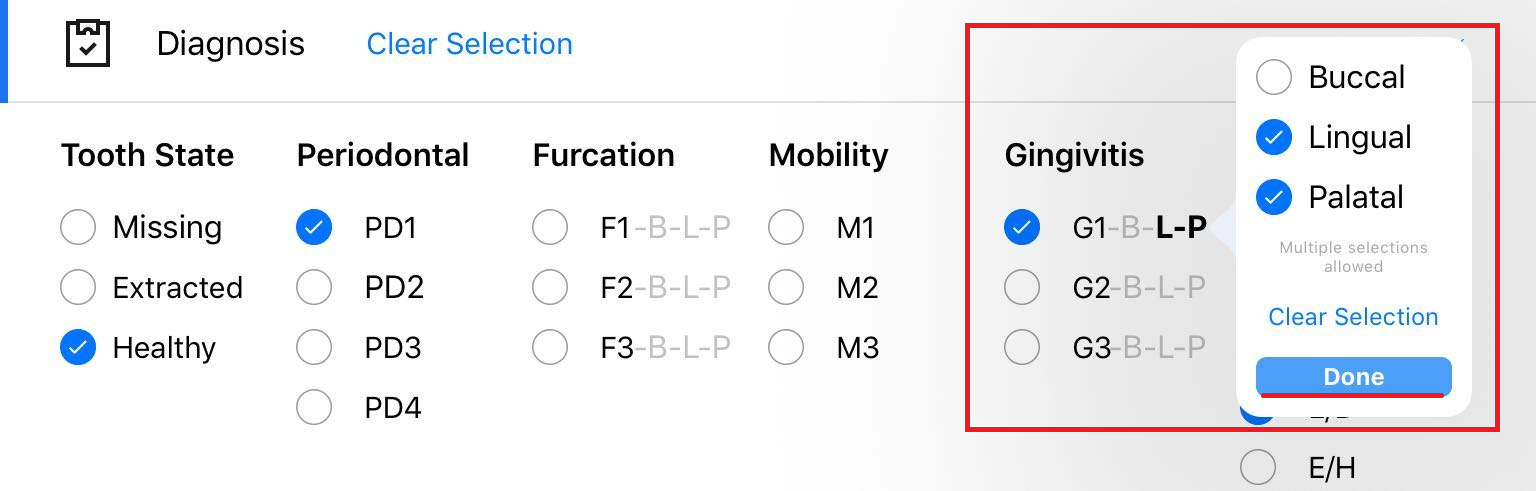
For your convenience, there are many options to select from:

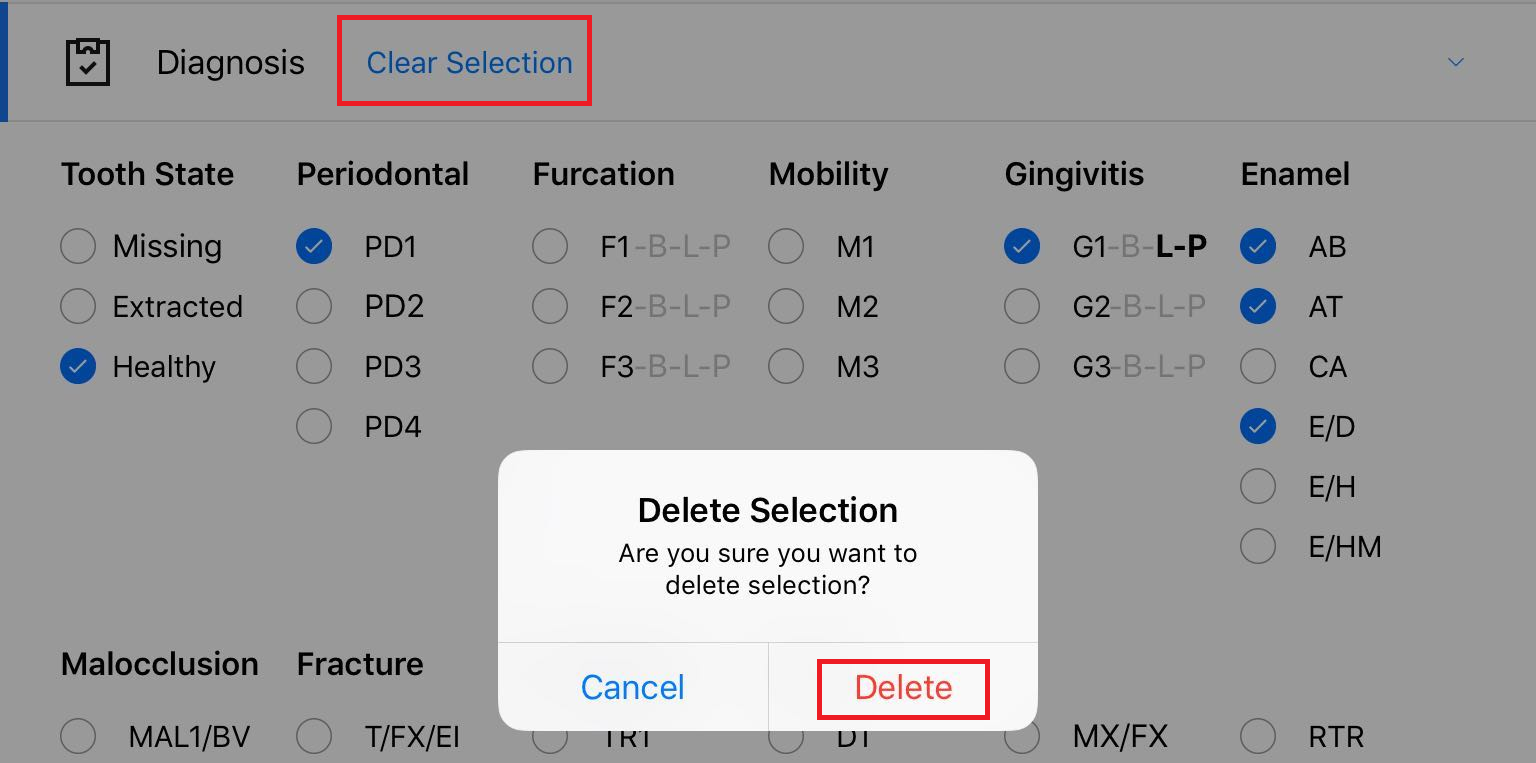
To avoid uncertainty, certain conditions, such as Tooth State, Periodontal, Mobily, or Calculus can have only one option selected.
Multiple selections are available for Enamel and Other, so you can choose as many options as you need.
For the Furcation, Gingivitis, Periodontal Pocket, and Gingival Recession the location can also be recorded. Please do not forget to confirm the selection by clicking DONE in the pop-up window:
It is possible to enter exact numerical values for the Periodontal Pocket, and Gingival Recession, just tap on the field, enter the value, and click DONE:

3. You can easily move between the Diagnostics and Treatment sections, just click on the icon to collapse or expand the section:

4. If you made enough mistakes and want to delete all the input data in the section, please click Clear Selection button next to the section name, confirm deletion and start from scratch:
5. Once the detailed records made, you can switch to another tooth. For quick navigation, you can swipe the page left/right or click the arrows next to the tooth number. Alternatively, you can click on the tooth number and select the one you want to edit from the Individual selection menu:

NOTE: You do not need to press any additional buttons to save the changes, as SmartFlow will save all your records after switching to another tooth automatically.
If you want to return to the main Dental Chart screen, just click Done:
Then you will see detailed dental conditions and/or notes icon near the selected tooth, and you can move on to the next tooth:

NOTE: For your convenience, all abbreviations will be expanded in the Dental Chart report:

We hope you found this information useful!
Did you find it helpful?
Yes
No
Send feedback Sorry we couldn't be helpful. Help us improve this article with your feedback.