How do I setup integration between SmartFlow and VisionVPM?
Print
Modified on: Fri, 11 Sep, 2020 at 11:53 AM
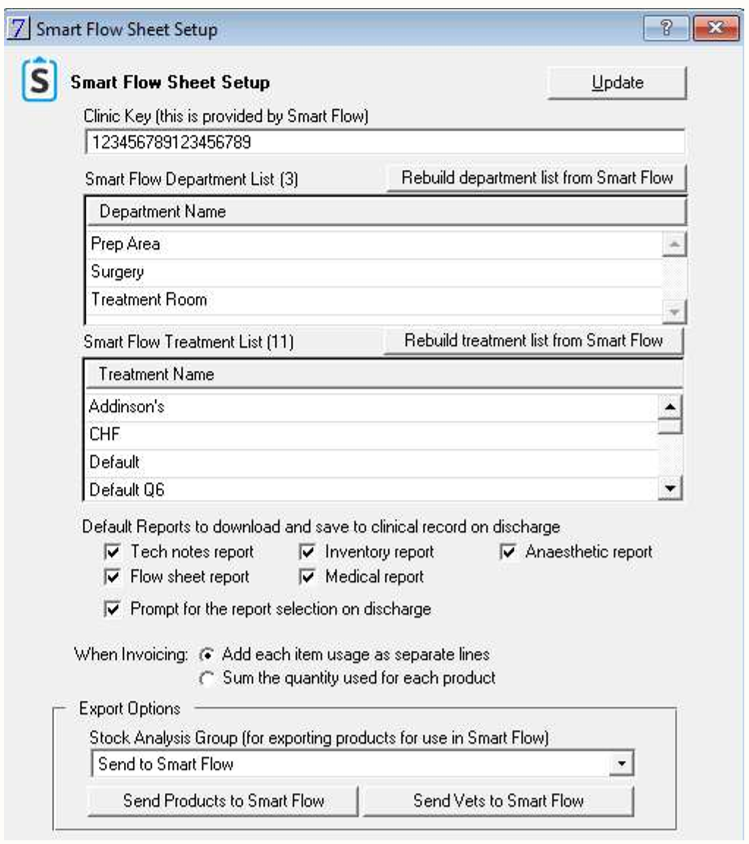
SmartFlow Integration settings can be found in Maintenance > System Defaults > SmartFlow Setup:
NOTE: If this option is greyed out, SmartFlow integration has not yet been enabled by the VisionVPM Service Desk.
NOTE: Only one SmartFlow account can be linked per VisionVPM database.
2. Click Rebuild department list from SmartFlow to choose the departments in SmartFlow available for the patient admission. This can be done later from the Admission screen.
3. Click Rebuild treatment list from SmartFlow to select Treatment Templates in SmartFlow that can be chosen for patient admission. This can be done later from the Admission screen.
4. Select the Reports to download from the SmartFlow upon discharge. Selected PDF Reports will be added to the patient's clinical record folder.
5. Change the way items are displayed after invoicing (under When invoicing option): add items into a separate line or sum the quantity for each product. We suggest leaving the default setting of separate lines as this adds the stock fee to each line.
6. Push inventory Products to SmartFlow as described HERE.
NOTE: For the correct billing, all the inventory products should be mapped in the SmartFlow.
7. Send Vets to SmartFlow (as described HERE) so they can be used in SmartFlow. You will need to repeat this action after adding any new staff in VisionVPM.
We hope you found this information useful!
Did you find it helpful?
Yes
No
Send feedback Sorry we couldn't be helpful. Help us improve this article with your feedback.